Changing process conditions
The process condition change window opens within the workflow administration interface by clicking the 'Edit Conditions' button. This window consists of two parts - a display of conditions in the form of a tree with nodes on the left, and a table of conditions located in the selected node, on the right.
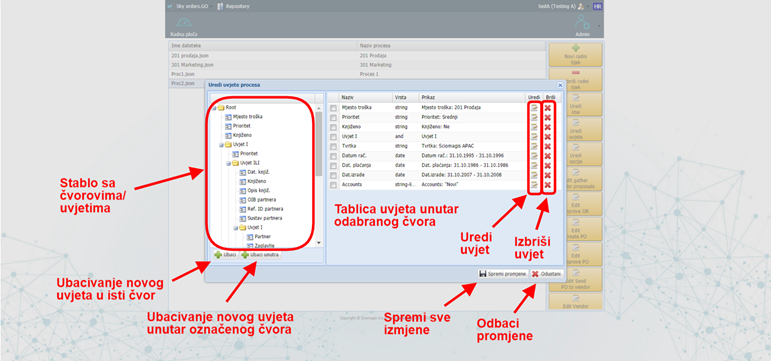
A node, or condition, can be marked by pressing the left mouse button either inside a tree or inside a table. By marking the conditions within the tree, the table will show all the conditions that are inside the node in which the selected condition is located, and the corresponding node will be automatically marked within the table.
Likewise, by marking conditions within a table, the same node will automatically be marked inside the tree.
There are two buttons in the lower right corner of the window, the 'Save Changes' button to save all changes made, and the 'Cancel' button to discard all changes.
The table consists of three columns with data:
- 'Name' - the name of the condition
- 'Type' - type of condition data, which can be 'string' (text), 'int' (integer - minimum and maximum value), 'date' (date - start and end), 'amount' currency), 'currency-int' (minimum and maximum value and currency), 'string-list-one' (selected account), 'or' (expression 'or') or 'and' (expression 'i').
- 'Display' - text display of conditions. The view by condition data type looks like this:
- for string: 'name: "entered_value"'
- for int: 'name: min_value - max_value'
- for dates: 'name: start_date - end_date'
- for amount: 'value: (currency)'
- for currency-int: 'name: min_value - max_value (currency)'
- for string-list-one: 'name: "select_name"'
- for or: 'or'
- for and: 'and'
Inside the table on the right are two more columns - 'Edit' and 'Delete', which contain icons for editing and deleting the entered conditions.