5.1. Groups Administration
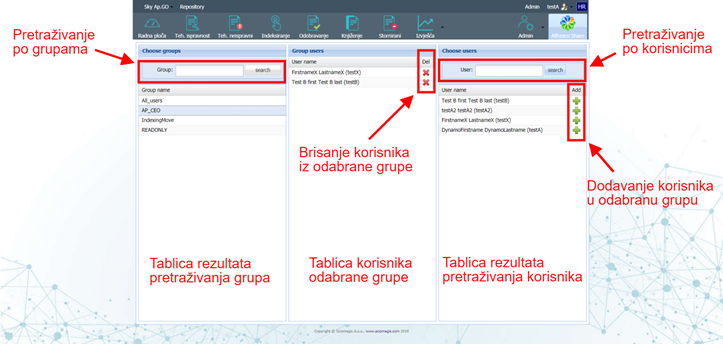
The user interface for administering groups is opened by clicking on the 'Admin' button on the toolbar and selecting the 'Groups' option. The user interface is divided into three parts. On the left is the 'Select groups' selection area, in the middle is the user administration area within the 'Group users' group, and on the right is the 'Choose users' selection area.
Select a group
The group selection area at the top contains the 'Group' field, in which you need to enter the search text. The search is done according to the text inside the group name. Next to this field is the 'Search' button that launches a group search. In the lower part there is a table of results in which all groups that meet the search condition will be listed.
Left-clicking on one of the user groups in the table will display the users within that group in the center of the screen.
User administration within the group
The center space is designated to display users who are within the highlighted group on the left. A table containing two columns is displayed here. The left column 'User name' shows which user it is (last name, first name and username), while the right column 'Del' contains the icon 'x', which is used to delete that user from the selected group.
In the right part of the screen there is a space for selecting users, which in the upper part contains the field 'User', in which you need to enter the text to search. Next to this field is a 'Search' button that will launch a user search. The search is done according to the text inside the user name. In the lower part there is a table of results in which all users who meet the search condition will be printed. The table consists of two columns. The left column 'User name' shows which user it is (last name, first name and username), while the right 'Add' contains the icon '+', which is used to add that user to the selected group.