Administration role
The role editing page is opened by pressing the 'Administrator' button on the application toolbar, and from the drop-down menu by selecting the 'Roles' option.
The user interface consists of a role table, on the left, and a toolbar on the right.
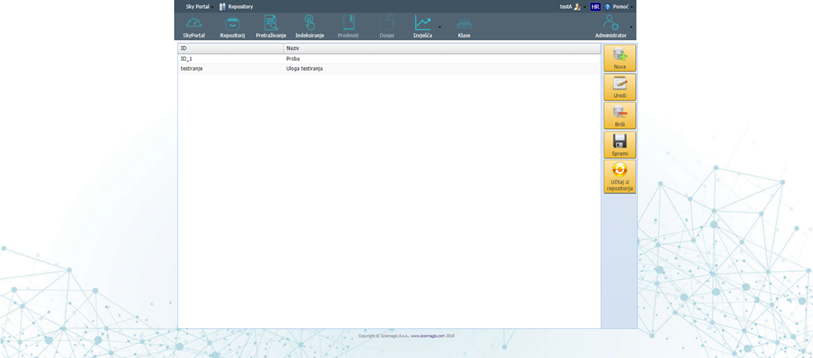
The role table consists of two columns: 'ID' and 'Name'. 'ID' indicates the unique role identifier, and 'Name' the name of the role.
The toolbar consists of the 'New', 'Edit', 'Delete', 'Save' and 'Load from Repository' buttons.
Clicking the 'Save' button saves all entered roles in the repository.
Clicking the 'Load from repository' button will load the last state saved in the repository. Before loading, a dialog box will open in which we can confirm that we want to ignore any changes to the roles and load the data from the repository, by clicking the 'Yes' button, or reject by clicking the 'Cancel' button.
By clicking on the 'New' button, a new role with an automatically generated ID and name will be inserted inside the table.
The 'Delete' button is used to delete the role. By pressing this button next to the previously marked role, it is deleted from the table. Before deleting, a dialog box will open in which we can confirm the deletion of this role by pressing the 'Yes' button or reject it by pressing the 'Cancel' button.
Clicking the 'Edit' button, next to the previously selected role in the table, will open a window for editing the 'Edit Selected Role' role data.
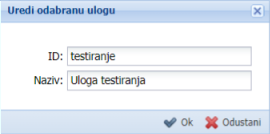
The role data editing window consists of two fields - 'ID' (unique role identifier) and 'Name' (role name). There are two buttons in the lower right corner of the window: 'Ok', which confirms the entry of the role change, and 'Cancel', which closes the window without changes.