Path setup
The user interface for administering paths is opened by pressing the 'Admin' button on the toolbar and selecting the 'Path setup' option, which is located under the 'Designer' menu. The user interface consists of a table and a toolbar, located on the right.
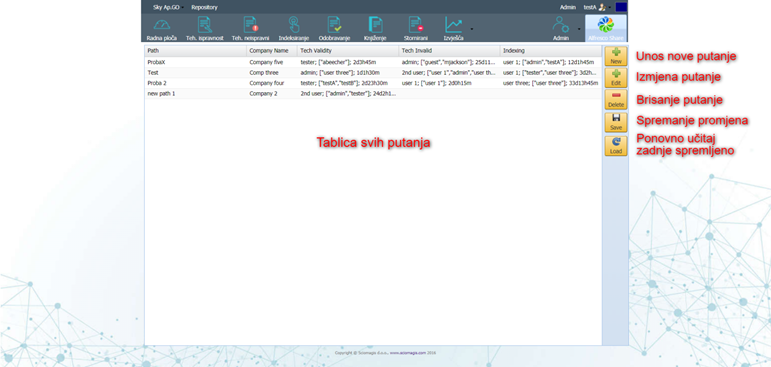
The table consists of the following columns:
- 'Path' - path name
- 'Company Name' - company name
- 'Tech Validity' - display of basic data for determining technical correctness
- 'Tech Invalid' - display of basic data for determining technical failure
- 'Indexing' - display basic data for indexing
The toolbar consists of the following buttons 'New', 'Edit', 'Delete', 'Save' and 'Load'.
Add and edit paths
Pressing the 'New' button adds a new path within the table without any data entered, except for the automatically generated name.
Clicking on the 'Edit' button, next to the previously marked path, will open a window for editing the path data, which is described in the chapter editing path data.
Delete path
The path, once highlighted in the table, can be deleted by pressing the 'Delete' button on the toolbar. Before deleting, the application will ask you to confirm whether we want to delete this path safely. Pressing 'Yes' confirms the deletion, while pressing 'Cancel' closes the window and nothing changes.
Saving and loading
All path changes are saved by clicking the 'Save' button on the toolbar.
By pressing the 'Load' button, the path data that was last saved is loaded. Before loading, the application will ask you to confirm whether we want to discard all changes and load the last saved state. Pressing 'Yes' will load the last saved state, while pressing 'Cancel' closes the window and nothing changes.