Working with classes
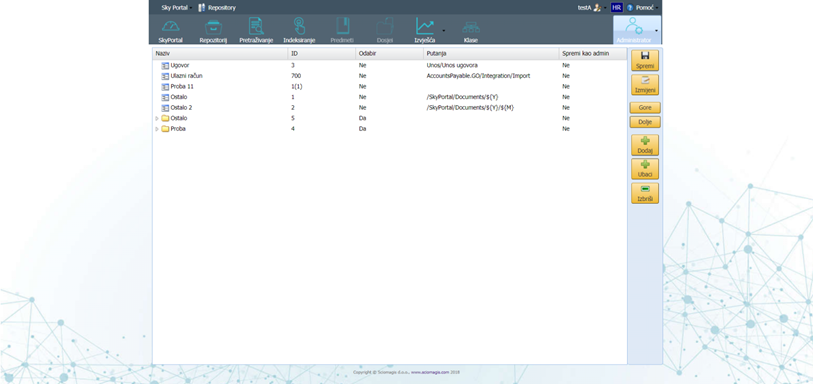
The class editing page is opened by clicking on the 'Classes' button on the application toolbar.
The user interface consists of a class table on the left and a toolbar on the right.

The class table is displayed in the form of a tree with nodes, each node of which is one class. The table consists of the following columns:
- 'Name' - the name of the class
- 'ID' - class identifier
- 'Selection' - whether it is possible to select that class
- 'Path' - class path
- 'Save as admin'
The toolbar has the following buttons: 'Save', 'Edit', 'Up', 'Down', 'Add', 'Insert' and 'Delete'.
Clicking the 'Save' button will save all changes made within this editor.
Clicking on the 'Edit' button will open a class editing window, which is described in detail in the 'Change Class' section.
The 'Up' and 'Down' buttons are used to position the class inside the tree. Changing the position of a class is described in the subsection 'Positioning a class inside a tree'.
New classes can be added by pressing the 'Add' or 'Insert' buttons. Setting up a new class is described in detail in the section 'Adding a new class'.
The 'Delete' button is used to delete a previously marked class within the tree.