Class change
Selecting a class within the table to edit the class, and clicking the 'Edit' button will open the 'Edit Class' window. This window consists of a form for modifying class information.
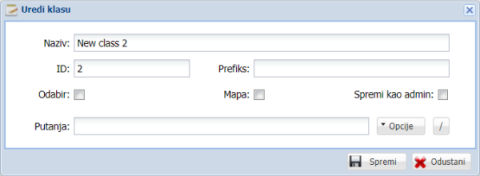
The class data editing window consists of a data entry form. The form contains the following fields and buttons:
-
'Name' - the name of the class
-
'ID' - class identifier. If an identifier that already exists is entered, a change to the class will not be allowed.
-
'Prefix' - a field that cannot be edited. The field displays the node identifier within which the class we are editing is located.
-
'Select' - whether it is possible to select a class. A check mark is placed inside the checkbox if it is possible to select that class within the application.
-
'Map' - whether the node is a map. A check mark is placed inside the check box if it is a node within which other classes can be placed.
-
'Save as admin' - a check mark is placed inside the checkbox to save the class under administrator privileges.
-
'Path' - shows the path of the class. The path can also be entered manually using the 'Options' drop-down menu and the '/' separator button. By pressing the 'Options' drop-down menu, it is possible to select one of the offered options:
-
'Add business' - added to the end of the class path code indicating the company name "$ {CN}"
-
'Add file name' - added to the end of the class path code indicating the full file name "$ {FILENAME}"
-
'Add file name without extension' - added to the end of the class path code indicating the file name without extension "$ {FILENAMEBASE}"
-
'Add file extension' - code is added to the end of the path of the class indicating the file extension "$ {FILENAMEEXT}"
-
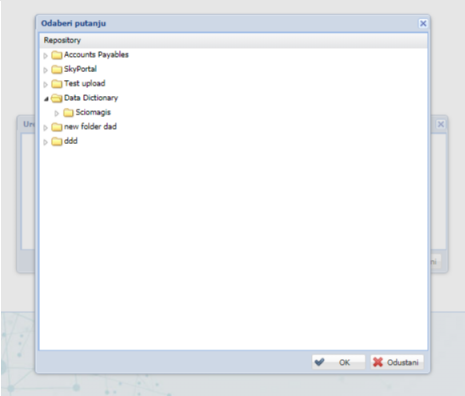
'Add Folder' - opens the 'Select Path' window. This window shows the structure of the folders within the repository, which is displayed in a tree view with nodes displaying the folders. The folder is highlighted by left-clicking on the desired folder. In the lower right corner of the window there are two buttons - "OK" and "Cancel". Clicking the 'OK' button will place the entire folder path in the 'Path' field at the end of the class path. Pressing 'Cancel' will close the folder selection window without any changes.
- 'Add separator' - is added to the end of the path of the separator label class "/".
- 'Add creation year' - added to the end of the class path code indicating the creation year of the file "$ {Y}".
- 'Add creation month' - added to the end of the class path code indicating the creation month of the file "$ {M}"
- 'Add creation day' - added to the end of the class path code indicating the creation date of the file "$ {D}"
- 'Add root class name' - added to the end of the class path code indicating the root class name "$ {TT}"
- 'Add full class name' - added to the end of the class path code indicating the full class name "$ {TS}"
- 'Add class name' - added to the end of the class path code indicating the class name "$ {TC}"
- 'Add partner name' - added to the end of the class path code indicating the partner name "$ {PN}"
- Pressing the separator button '/' adds the separator label "/" to the end of the class path.
In the lower right corner of the window there are two buttons - 'Save' and 'Cancel'. Clicking the 'Save' button will save the class changes, while clicking the 'Cancel' button will close the window without any changes.