Indexing
The index page opens by clicking the 'Index' button on the application toolbar.
The user interface is divided into three parts. On the left side there is an overview of the document being indexed, and on the right side the working part, which is divided into two parts - the form for entering indexing data from the top side, and the repository view from the bottom side.
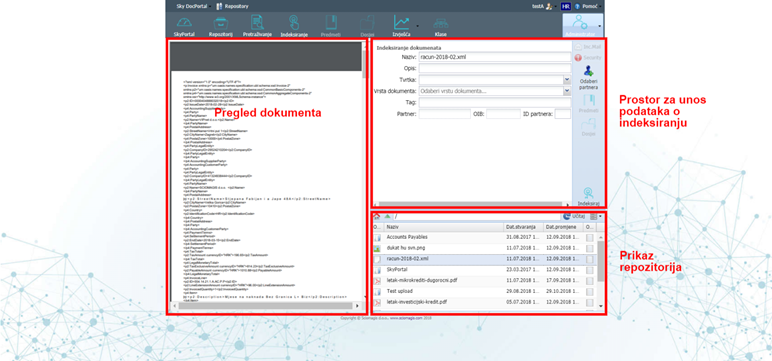
Within the repository view, it is possible to select the file on which the indexing will be performed. The functionalities of this part of the application are the same as when working on a table within a repository, which is described in the 'Repository' chapter. So, it is possible to move inside the repository by entering the folder by double-clicking the left mouse button on the folder, and exiting it by pressing the '' button. Pressing the '' button positions it in the root folder of the repository. Selecting a file is done by left-clicking on the file. Selecting a file in the file preview area will display that file, and in the index data entry form, information about that document. . The index data entry form consists of an input field, on the left, and a toolbar with buttons on the right. The form contains the following fields:
- 'Name' - the name of the document
- 'Description' - a description of the document
- 'Company' - select a company from the drop-down menu
- 'Document type' - select the document type from the drop-down menu. Clicking the arrow to the right of the field will open a tree-shaped drop-down menu with nodes representing the document type. The selection is made by left-clicking on the desired document type inside the tree.
- 'Partner' - enter the name of the partner
- 'OIB' - OIB of the partner
- 'Partner ID' - A unique partner identifier
- 'Tag' - a mark that will be placed on the document, through which the document can be searched later
On the toolbar on the right, two buttons are important - 'Index' and 'Select Partner'.
By pressing the 'Index' button, the selected file is indexed.
Pressing the 'Select Partner' button will open a partner selection window, which is described in detail in the 'Partner Selection' section. Selecting a partner will automatically fill in the 'Partner', 'OIB' and 'Partner ID' fields